I just finished doing a test of three brands of fusible web to determine what works best for the laser cut fusible appliques that I will be selling. I wanted to be sure that my kits were high quality and would hold up whatever finishing touches were used. I purchased each of these at the full price charged by the store. No freebies or perks here, I just simply wanted the best product for my project!
The three fusible products that I chose were based on reviews and things I had heard or been told. I was really hoping for Attached Inc’s Misty Fuse to be the winner, as it does not have the paper backing, so should be better for the environment and less paper waste for me to dispose of. It also has the reputation of leaving the fabrics with a softer hand (Alittledesignhelp.com defines “hand” as “the ‘feel’ of the fabric against your skin.”) because of it’s sheerness. I have used Bosal In-R-Form in tote bags before and loved it, and have read good things about their Splendid Web Plus, so chose that as a trial as well. For the third choice, I used Warm Company’s Steam-a-Seam 2. I have seen this brand recommended on many websites, so it also made my list.
Here are the steps I used for this test:
- I used a piece of unwashed fabric from my stash and cut three 4 ½″ strips from this same piece so that all three fusibles would be tested on the exact same fabric.
- I put the three different fusibles on the back of the fabric strips using the large heat press that I will be using for my fusible laser cut appliques, noting and following each of the manufacturer’s instructions, and documenting temperatures and steam/no-steam, etc for future reference.
- I then cut three 3 ½″ squares from each of the strips, using the laser. This is important to note, as the heat of the laser melts the fusible while cutting, and the fusible bonds to the cut edge, helping to keep it from fraying afterwards.
- I then ironed three squares of each type of fusible backed fabric to a base fabric (sheeting from my stash) that I had serged the edges on so it would hold up through the washings. I did this step using my Rowenta home iron, again following the manufacturers’ instructions. I knew my future customers would be using a home iron, and thought it was important to replicate the process that would be used to put a kit together.
- For each of the different fusibles, I left one square raw edged, the second one used the raw edge applique technique, stitching about an 1/8″ from the edge with a straight stitch, and the third square was stitched down with a traditional zig zag satin stitch. One of the things I looked at through this process was the ease of sewing through each of the fusibles. I had no problem with the needle gumming or getting through with any of these products.
- Then the washing began! I washed this sample several times to see how well each of the fusibles held up to the washing. I did not give this piece special or gentle treatment. I threw it in with whatever laundry I was doing that was appropriate: towels, t-shirts, and even jeans! I washed with warm water and used the regular setting on my dryer.
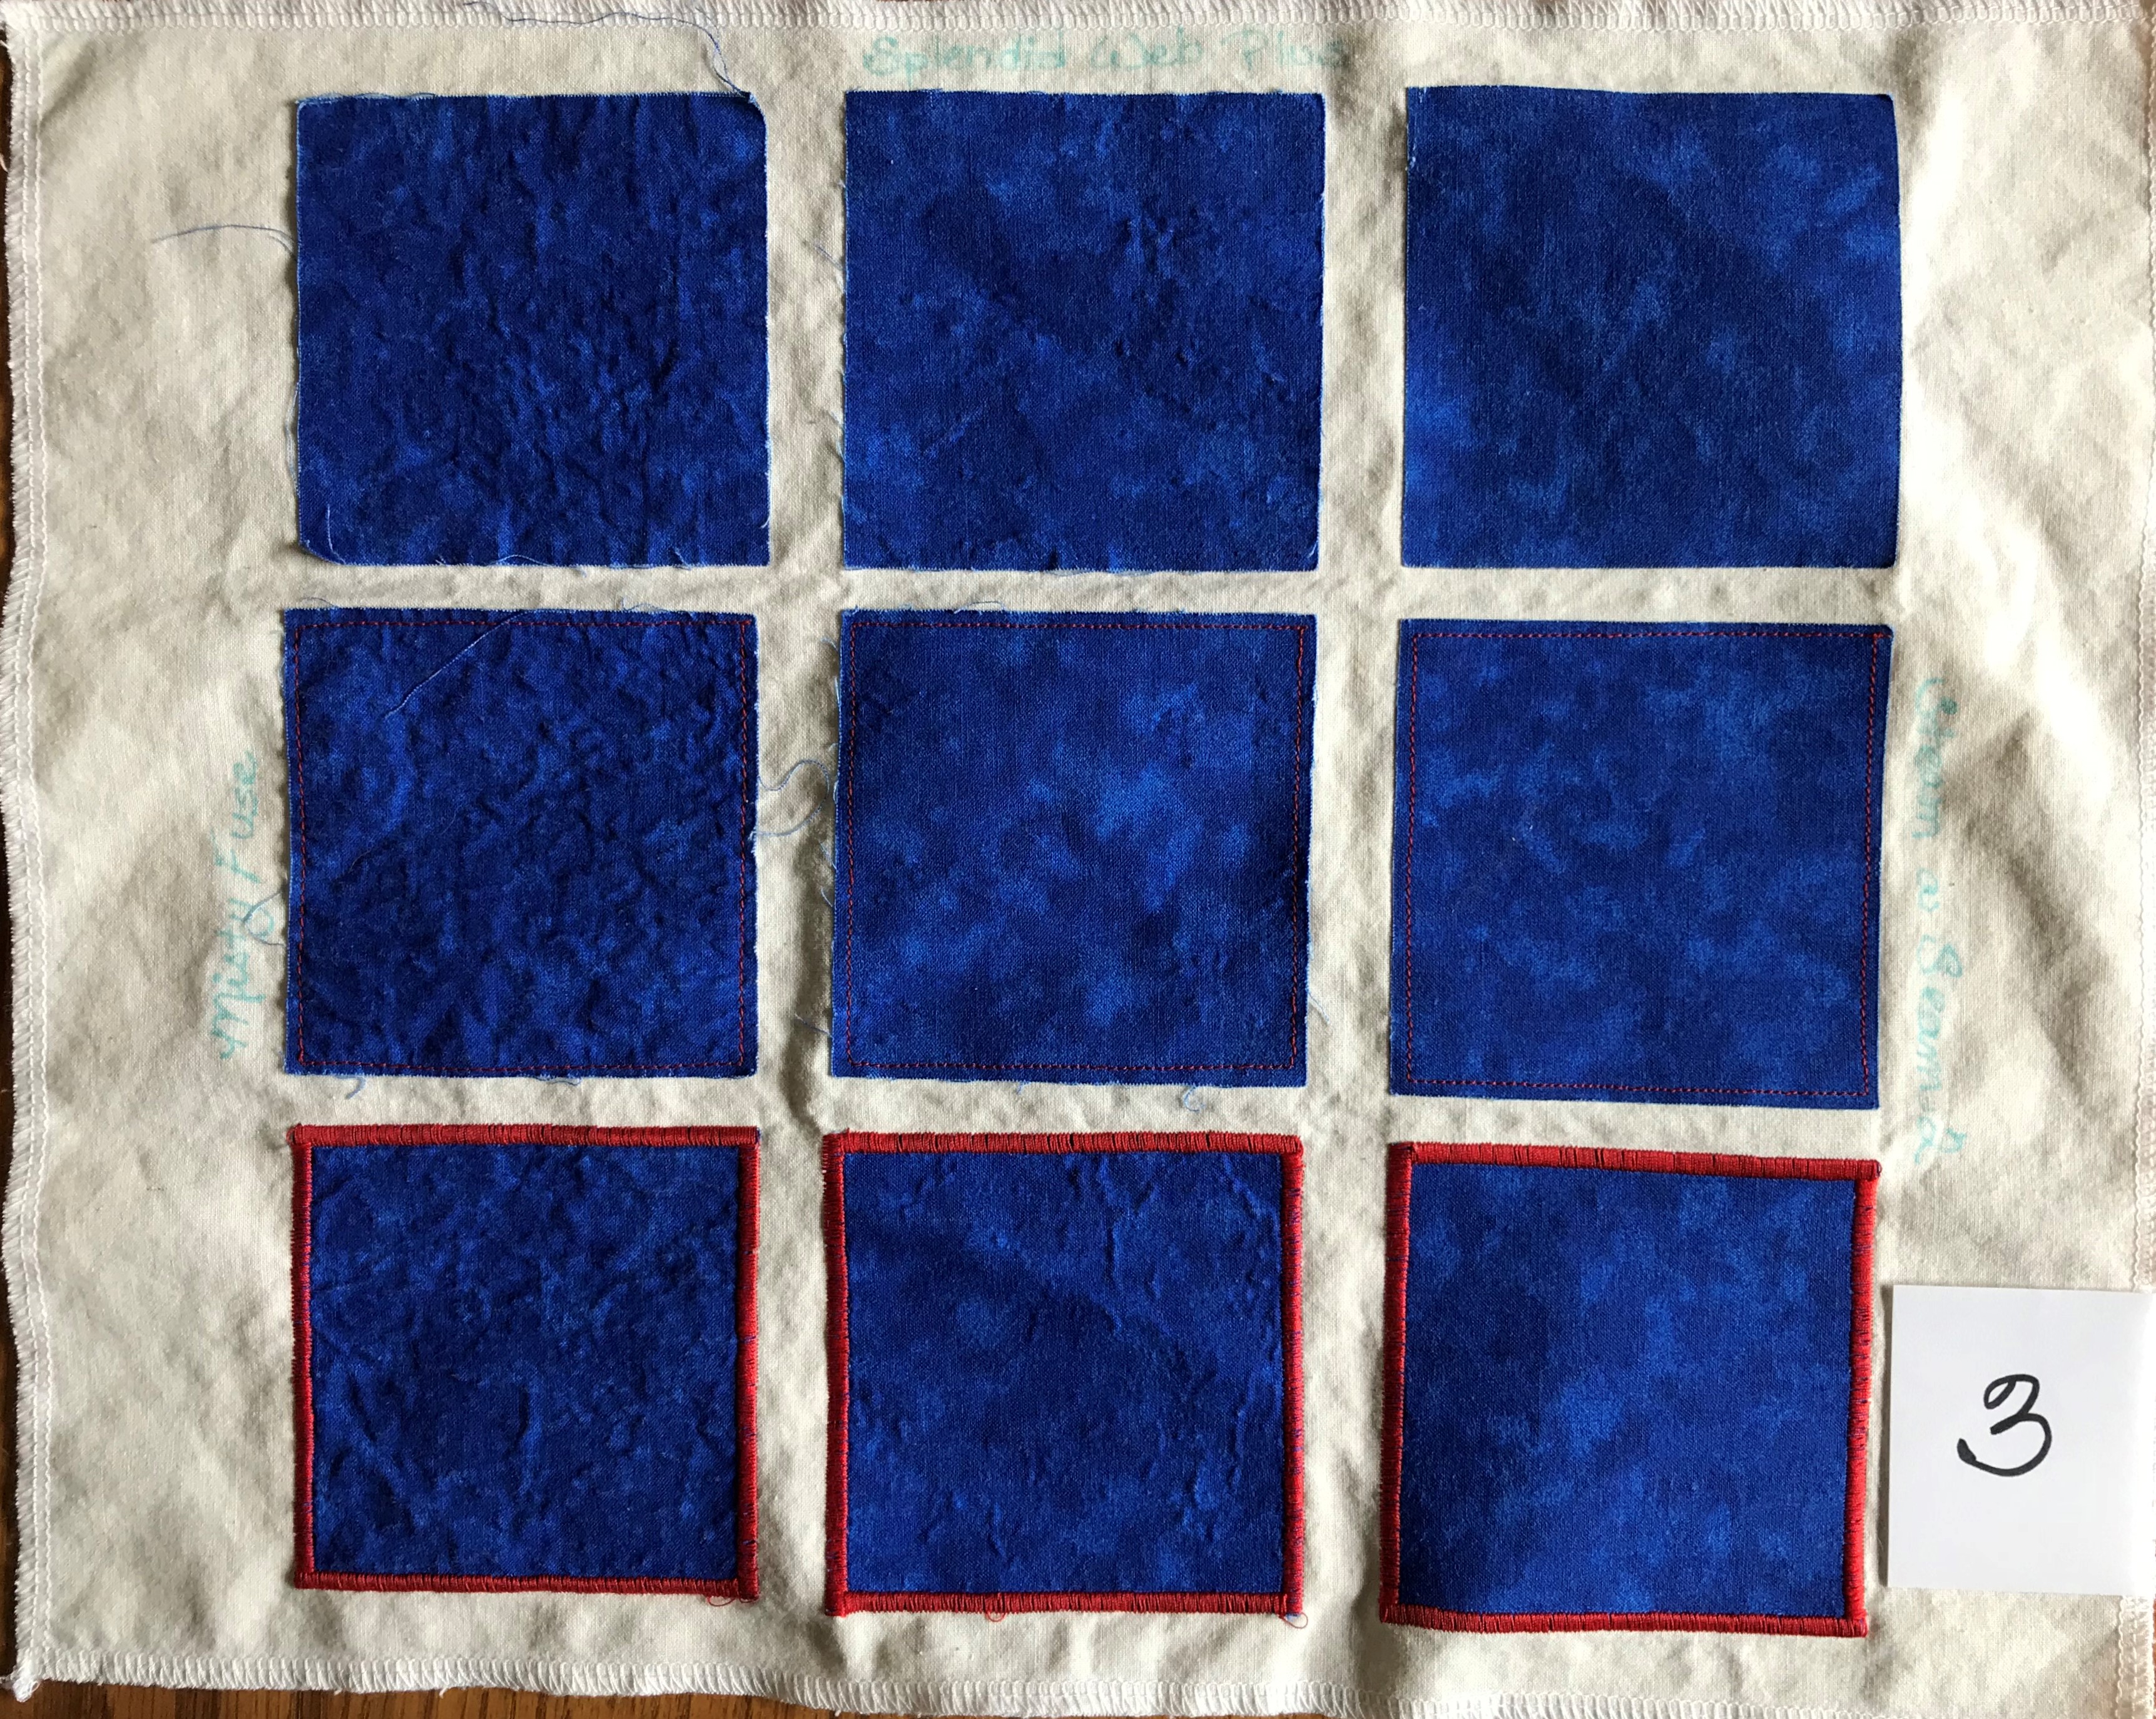
The following photos clearly show the results after five washings!
The left column is Attached Inc’s Misty Fuse, the middle column is Bosal Splendid Web Plus, and the right column is Warm Company’s Steam-a-Seam 2. This was test for my purposes, so I didn’t get fancy. I just wrote the names with a permanent maker on the backing fabric.
This first photo is the piece before washing. You can see that they all started out the same.

This next photo is after two washings. I did NOT iron the samples after washing and drying for any of the washings. I did not want to change the results in any way. You can see that the top two squares in the first column (Misty Fuse) are starting to fray and bubbles are starting to form between the top and bottom fabric. The same is happening in the middle column (Splendid Web Plus), but not as bad as the first column. (This actually started happening after the first wash, and I took a picture, but it must have gotten deleted.) The third column, Steam-a-Seam 2, is showing no fraying or bubbling. Please keep in mind that I was not careful in the washing and drying of this sample. This test was for my purposes, and your project may call for some of the attributes of these other webs!

The following photos are from washes 3, 4, and 5, as numbered. I did not trim any frays, or iron after washing. Number 4 looks smoother, but I think that is just because I got it out of the dryer faster.


I quit after five washings, as I knew at that point what I was going to use! There was such a difference between the three that I didn’t feel I needed to go any further. The third column, Steam-a-Seam 2, was still firm with no bubbles, and no fraying on the top square that did not have any stitching. Both of the others were bubbling and the raw edges were fraying.
Now you know! The Artfully Quilted Design Pre-Fused Laser Cut Applique kits will be made with Steam-a-Seam 2! An added plus? The repositional quality of this fusible is wonderful for getting those little pieces in just the right place, and they stay there until you press it!
